

.jpg)

Wow! What was 'sposed to take 4 days is only gonna take 1 and 1/2!!! The 2 restorer guys today worked really hard & everything is back together! They just have to come back tomorrow for some touch up painting and a little trim! Yahoo! I'm so excited! So tonight we're gonna have spaghetti and sausage & sing the Italian Mambo song! Here's a link so you can sing along with us!
Monday, August 8, 2011
My niece's bridal shower gift!!!
So I wasn't able to get to WA state for her shower. I was really sad! But I wanted to make her a special OOAK gift. I decided to make her a small beaded purse for her to keep her honeymoon key and an emergency $100.00 in...everyone needs to have an emergency $100.00. Her wedding isn't until the end of the month, so told her to start saving! Or maybe, as a "bursa", she'll get some money at the wedding. Anyway, I forgot to take the final shots of it before I mailed it! So all I have to show you are process shots until my family sends me shots from the shower!
Here we go:
1. Bead front and back of the purse and pin in the lining.

2. This is the lining on the inside ready to sew.

3. This is the lining sewn in.

4. This is edging the thick part of the purse.

5. This is putting the picot edging around the open top.

I'll add the finished photo when I get it from my family.
See? I told you we've been busy! :)
House Pouch
Before the restorers came today, I wanted to bless our house. So yesterday I smudged the whole thing! Every nook and cranny! And I made the house a pouch. I made sure it was placed in the wall of the house before the insulation was put in. Here's the process:
1. Make a knotless netting pouch.

2. Add a cord and beads.

3. Choose crystals, stones, charms & write wishes.

4. Add gifts to pouch.

5. Tie pouch tightly.

6. Leave in framing before insulation is put in.

Then just make sure the restorers really leave it there!
I hope our home feels loved and happy now!
We were RAAKED!
So while all the kitchen mess was going on,
we got a RAAK from a pal in HI.
(Remember a RAAK is a Random Act of Art Kindness)
Lots of goodies in this box!!!
Who knows what we'll make of it all!

It sure was nice to be treated during this time! Thanks pal!
2011 Kitchen Leak
OK...so I've been talking about out kitchen having to be restored. Here's why. Ron noticed a dripping outside next to the house under our hose. He thought it was the hose & moved it, but it remained. So we called out the NM Leak Detection people. They pried open under our cabinets & a storm of mold came flying out!!! They, the plumber & the restorers have all been working on this. We had to get down to what the cause was before our insurance would even consider covering us. So the counter tops, cabs, sink, etc. were all ripped out. There was so much water, mold & wet wood (including the framing!) under there that we had a dehumidifier living with us for 11 days. We ended up calling him R2D2. Finally one of the restorers said it was dry enough for the plumber to come & try to find the leak. She & Ron did a simple water test & found a hole had been drilled into a pipe, filled & covered with duct tape! It had passed the water inspection, but over time the hot water from the sink, dishwasher, & our upstairs shower, loosened it all up. So since it was what some people call "sabotage", & happened 7 years ago, our insurance wouldn't cover us. They would only cover from the time we bought coverage with them. ACK!!! So today the restorers are back trying to put it all together. Ron bought a cabinet that sorta matched & they're trying to make it work with some leftover pieces. Here are some pics:


This is 7 years of wetness & mold under our cabinets.

This is R2D2 - the dehumidifier that ran 24/7 for 11 days!

Here is the hole that had been drilled into a pipe.
It was hidden behind another pipe!

Here is Ron putting in a screwdriver to measure the size of the drilled hole.

This has been a major mess!!!
Trying to cook & wash dishes without a sink has been crazy!
Our dining room table is covered with tubs & a drying rack.
And the noise from R2D2 was really tiring.
I can't wait to get it all back together!!!
Flaming Muse Workshop
So while our kitchen is being restored to it's beautiful self, I decided to take an online creativity workshop. It's pretty intensive, deep and fun! I'm in my last week now, just as the kitchen is getting finished! We had videos to watch & assignments to do. I'm just gonna show some of the assignments without explanation. It would take too long to go over 3 weeks' lessons! :)
This is my bliss board:

This is my Irrelevant sign

This is my permission slip

This is my MORE page

And this is called The Magic Circle.
It's by John William Waterhouse & really inspired some of my magic work!

Culture Inspired art
As I've been doodling, I had an idea to make some culture inspired art. Here are 2 hearts I did. One is inspired by the Southwest and the other is inspired by Celtic design.


I'm not sure where I'm going with all of this,
but it sure has helped me relax with all the work going on in our kitchen!
Adjustable Cords!
Don't we all love adjustable cords?! Well my DH found me some instructions online so I could make a necklace for the pendant my pal brought me. And here it is!


And what I learned on this was to make sure your knots are bigger than the beads at the end or they'll fall off and you have to start over! :)
Practice and Problems
While my pal was here, I gave her a quick tutorial on needle felting. I made a couple pieces with her 'cuz I wanted to see if they'd fit on greeting cards. Too thick! Ah, well. Maybe I can use them for something else!


Doodle Style ATC for a pal
While my pal was here, we worked on Zentangle inspired art & just some regular doodling. I made her this ATC to mail to her later & thank her for being my pal:


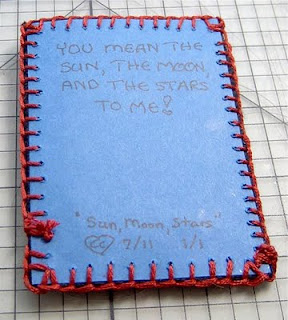
Ron's Felted ATC
When my pal came to visit, my DH helped us. He let us play in the studio while he cooked meals for us. So I wanted to let him know how much I appreciated him. I made him this felted ATC. He said he liked it. Hope so!


1. Finish a felted ATC on craft felt

2. Gather materials

3. Iron Wonder Under to cardstock & ATC

4. Trim excess

5. Button hole stitch ATC to cardstock

6. Write on cardstock

7. Finished ATC

Long Time No See! :)
As you'll see, we've been busy here in NM!!! So sorry for the delay in posting! Hope you all are well!
The first thing I want to show is another needlecase I made for a pal on Kaua'i. This came from Martha Stewart's site/craft section:


The first thing I want to show is another needlecase I made for a pal on Kaua'i. This came from Martha Stewart's site/craft section:
1. Cut all pattern pieces and gather materials

2. Cut and iron all pieces

3. Stitch all layers together

4. Start stitching buttons to one layer

5. Buttons stitched to one page

6. Gather other materials to add to case

7. Add more buttons

8. Add needles and pins

9. Add safety pins and invisible thread

10. Add colored thread and a bandaid

11. Finished needlecase

Happy Belated Birthday, Pal!
Subscribe to:
Posts (Atom)